
Configuring a compute node
Last updated on 2026-06-19 | Edit this page
Overview
Questions
- What packages does a compute node need to join the cluster?
- How does the compute node authenticate with the login node?
Objectives
- Install the required packages on a compute node
- Copy the Slurm configuration and munge key from the login node
- Mount the shared filesystem from the login node via NFS
- Start munge and slurmd services
- Disable WiFi once the compute node is connected via ethernet
This section demonstrates how to set up a compute node on your Raspberry Pi, and add it to your cluster.
Flash an SD card as described in episode 2 and give it a name of
node02 where node is the name that you use for
all your nodes in your HPC (e.g. orange,
black, green, blue,
yellow).
Check the hostname (and fix if required)
Check your hostname for your compute node ends 02. We
covered this in more depth in the last section, so refer back to that
for more info. In short, check it with the command
hostname, and edit with sudo raspi-config if
it is incorrect.
No changes to /etc/hosts are needed on the compute node.
Cluster-wide hostname resolution (all nodes resolving each other by
name) is provided by dnsmasq on the login node and IP addresses are
delivered to compute nodes via DHCP. The hostname for the compute node
is all that is needed locally.
Tip
You can confirm the login node has seen this compute node and issued it a DHCP lease by running the following on the login node (try it!):
Each line is an active lease: expiry timestamp, MAC address, assigned
IP, hostname, and client ID. Your compute node should appear with the IP
you reserved for it in /etc/dnsmasq.conf by setting a
dhcp-host line with the MAC address for the compute
node.
This is also a useful way to check IP addresses assigned to cluster
nodes if they aren’t ending up where you expected, and you can even edit
the file and delete lines to clear DHCP leases for clients if they have
the wrong IP address (for example, if their MAC address wasn’t added to
/etc/dnsmasq.conf on the login node).
Start with an update
We need to update packages on the compute nodes, too:
Network Interface Priority
When you have multiple network adapters attached to a computer, the computer needs to know which interface to route traffic over. This is selected based on the priority of the interface.
During initial setup, while both wlan0 and
eth0 are connected, your Pi can get confused about which
interface to use for internet traffic. If packages aren’t downloading,
give wlan0 a higher interface priority. Grab the device
name from nmcli:
BASH
pi@node02:~ $ nmcli con show
NAME                              UUID                                  TYPE      DEVICE
netplan-wlan0-CarpentriesOffline  e5799f3d-8920-3080-b93f-e6e5ac4ce778  wifi      wlan0
netplan-eth0                      75a1216a-9d1a-30cd-8aca-ace5526ec021  ethernet  eth0
lo                                c4c925ab-c23d-4a84-86f3-bb9133a05b92  loopback  lo
Then give wlan0 a higher interface metric:
BASH
sudo nmcli con mod netplan-wlan0-CarpentriesOffline ipv4.route-metric 100
sudo nmcli con down netplan-wlan0-CarpentriesOffline && sudo nmcli con up netplan-wlan0-CarpentriesOffline
Once wlan0 is disabled at the end of this tutorial, the
compute node routes all traffic through eth0 to the login
node, which provides internet access via its own wlan0.
Install required packages
ntp and ntpdate are no longer available on
current Raspberry Pi OS. Use ntpsec and
ntpsec-ntpdate instead; they provide the same
functionality.
| Package | Purpose |
|---|---|
slurmd |
Slurm compute node daemon: executes jobs dispatched by the login node |
slurm-client |
Slurm client tools (srun, sbatch,
squeue, etc.) |
munge |
Authentication service used by Slurm to verify inter-node messages |
ntpsec |
NTP time synchronisation daemon: keeps node clocks in sync with the login node |
ntpsec-ntpdate |
One-shot time sync command, useful for initial clock correction on first boot |
lmod |
Lua-based module system for loading software environments (e.g. EESSI) |
nfs-common |
NFS client utilities to mount the shared filesystem from the login node |
vim |
Text editor that confuses people trying to exit it. Try
:q if stuck. |
Verify that slurmd installed and the service unit is
present:
:: caution systemctl should show that Slurm is
installed, but not configured yet. This is OK for now! We haven’t
configured it yet, so it will be in a failure state:
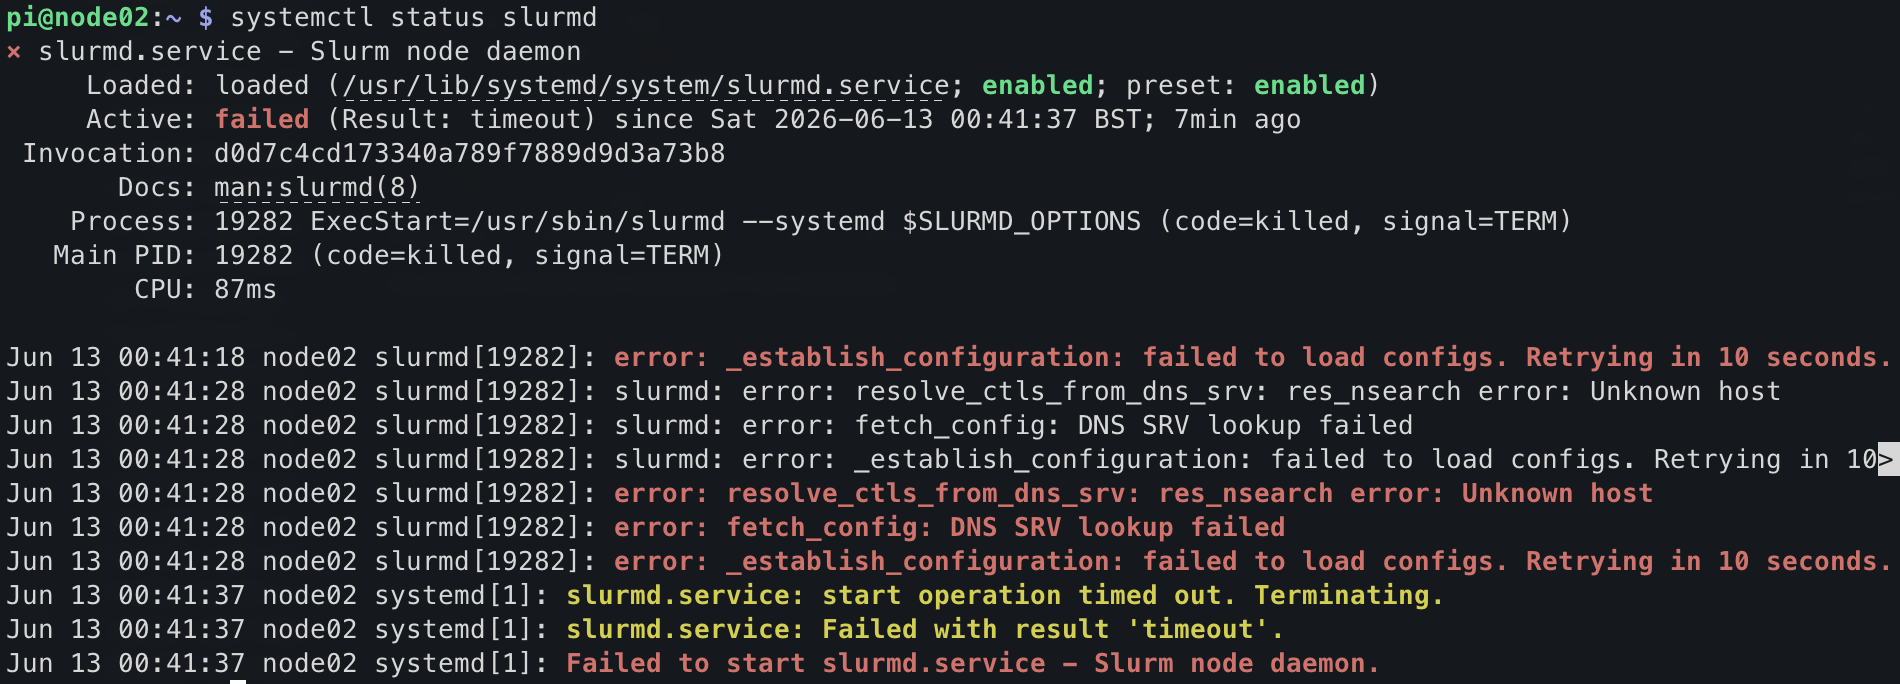 ::
::
If slurmd is not found, the package may have been
silently skipped during install. Run the install command again with only
slurmd to confirm:
Create a mount point for the shared drive
Copy configuration files from the login node
1. Slurm configuration files
Copy the slurm config from the login node to
/etc/slurm/slurm.conf:
On login node:
scp /etc/slurm/slurm.conf pi@node02.local:slurm.conf-
On compute node:
2. Munge key
Copy /etc/munge/munge.key from the login node to the
compute node:
On login node:
BASH
sudo cp /etc/munge/munge.key munge.key
sudo chown pi:pi munge.key && chmod 664 munge.key
scp munge.key pi@node02.local:munge.key
rm munge.key
On compute node:
BASH
sudo mv munge.key /etc/munge/munge.key
sudo chmod 400 /etc/munge/munge.key
sudo chown munge: /etc/munge/munge.keyTip
munge.key is owned by root with permissions
400, so scp cannot read it directly as the
pi user. The steps above copy it to the home directory
first and relax the permissions just long enough to transfer it, then
clean up the temporary copy.
3. Filesystem table (fstab)
Update /etc/fstab to show the following:
BASH
# Leave these lines alone:
proc            /proc           proc    defaults          0       0
PARTUUID=3e3e7392-01  /boot/firmware  vfat    defaults          0       2
PARTUUID=3e3e7392-02  /               ext4    defaults,noatime  0       1

# Append these lines:
192.168.5.101:/sharedfs    /sharedfs    nfs    defaults   0 0
192.168.5.101:/home    /home    nfs    defaults   0 0
Then reload the modifications and mount everything:
Slurm cgroups configuration
Slurm’s cgroup plugin is used by slurmd to enforce
resource limits on jobs. We need to configure this on our compute nodes.
Create /etc/slurm/cgroup.conf:
BASH
sudo tee /etc/slurm/cgroup.conf << 'EOF'
CgroupPlugin=autodetect
ConstrainCores=yes
ConstrainRAMSpace=yes
EOF
And /etc/slurm/cgroup_allowed_devices_file.conf:
BASH
sudo tee /etc/slurm/cgroup_allowed_devices_file.conf << 'EOF'
/dev/null
/dev/urandom
/dev/zero
/dev/sda*
/dev/cpu/*/*
/dev/pts/*
/dev/shm
EOF
This should be a reasonable default configuration, but for a deeper
dive, see (the Slurm cgroups documentation)[https://slurm.schedmd.com/cgroups.html]
Start munge and slurmd
Now that the config files are in place, start munge first (slurmd depends on it), then slurmd:
slurmd should now show active (running). If
it still fails, check the log for details:
Install EESSI
BASH
mkdir eessi
cd eessi
wget https://raw.githubusercontent.com/EESSI/eessi-demo/main/scripts/install_cvmfs_eessi.sh
sudo bash ./install_cvmfs_eessi.sh

source /cvmfs/software.eessi.io/versions/2023.06/init/lmod/bash

# Older versions of EESSI needed us to put the source line into profile:
# echo "source /cvmfs/software.eessi.io/versions/2023.06/init/bash" | sudo tee -a /etc/profile
# We don't need to do this any more
Disable WiFi and Bluetooth
Unlike the login node (which keeps wlan0 as its internet
uplink), the compute node can now disable WiFi. All traffic will route
through eth0 to the login node and out via its
wlan0 connection.
sudo nmcli con down netplan-wlan0-CarpentriesOffline
should take down the default network configured in the Raspberry Pi
Imager software. However, we can permanently disable the hardware for
the built-in WiFi chip in the boot configuration file.
Open /boot/firmware/config.txt and add the following two
lines at the bottom in the [all] section.
Save the file and reboot! You now have a configured compute node. In
the next section, we’ll test our cluster by submitting jobs with
slurm.
- The compute node must have the same munge key as the login node for Slurm authentication
- Copy
slurm.confandmunge.keyfrom the login node before startingslurmd - Mount shared filesystems via NFS entries in
/etc/fstab - Disable WiFi on compute nodes so all traffic routes through
eth0to the login node