
Preparing an SD Card
Last updated on 2026-06-19 | Edit this page
Overview
Questions
- How do you write an OS image to a Raspberry Pi SD card?
- What configuration can be applied to the SD card before first boot?
Objectives
- Download and install the Raspberry Pi Imager tool
- Select the correct OS image for the Raspberry Pi
- Pre-configure hostname, user credentials, SSH, and WiFi settings before writing the image
Every computer needs to load an operating system when you switch it on. Therefore it will usually have a default place where it will look for an operating system in the first place. The process of loading the operating system is called booting. In general, if someone tells you to reboot your computer it means to switch is off and switch it back on again so that the operating system can be loaded from scratch. In the case of your desktop or laptop computers you will have a hard drive built into the computer or alternatively you might be able to boot from a USB device.
In the case of the Raspberry Pi its default booting device is an SD card. The orignal Rasberry Pi used a full-size SD card but from the RPi2 micro-SD cards are used. SD cards are available in various capacities, ie. the amount of information that can be stored on it. A basic operating system for the Pi will take about 3GB but you will also need space for all the Carpentries lesson files and other software that you want to make available to the learners.
Usually when you buy a RPi you can also buy an SD card with the operating system pre-loaded. Alternatively you can buy an empty SD card and prepare it yourself. Preparing the SD card involves downloading an image of the operating system (and there are various versions available). We will also download and use the Raspberry Pi Imager software to write the image to the SD card.
Internet connectivity might prove to be a problem during this workshop so your instructor might bring an image along that can be copied or perhaps provide pre-prepared microSD cards.
The Raspberry Pi can run several operating systems including several flavours of Linux. The official Raspberry Pi OS is based on Debian Linux.
If you have not already done so you have to download and install the Raspberry Pi Imager. Using your browser, navigate to the Raspberry Pi download page. You should now be able to select the download for your operating system. Click on the appropriate link and save the installation file to your computer. The web page will provide further information for installing the software on your computer. Once the installation is complete you should be able to run the Imager which will open with the following screen:
Creating an SD card image: step-by-step
Setting up a Raspberry Pi
The Raspberry Pi imager software is updated frequently, so these screenshots may not exactly match what you see. This guide is up to date as of June 2026. The official Set up your SD card tutorial on the Raspberry Pi website is updated more frequently.
When using the The Raspberry Pi Imager, select the Device and OS.
The OS selection should be Raspberry Pi OS (other) ->
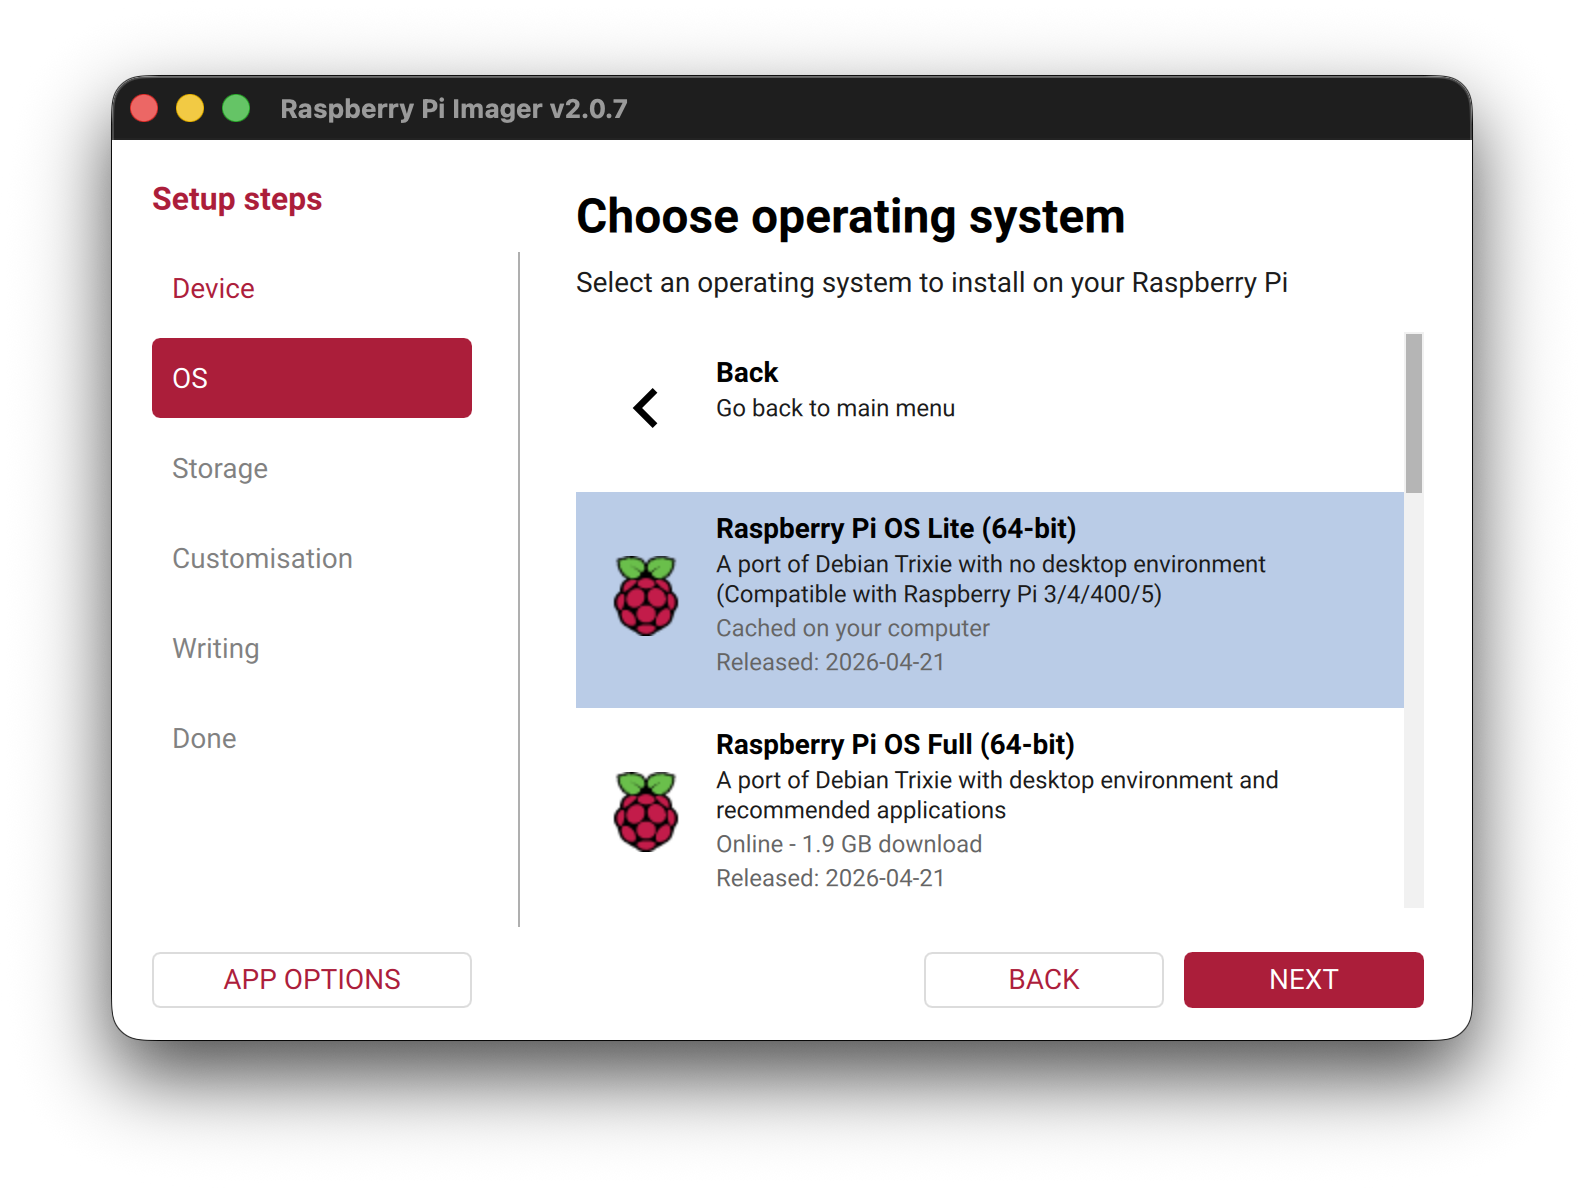
Raspberry Pi OS Lite (64-bit).
First, select the device:
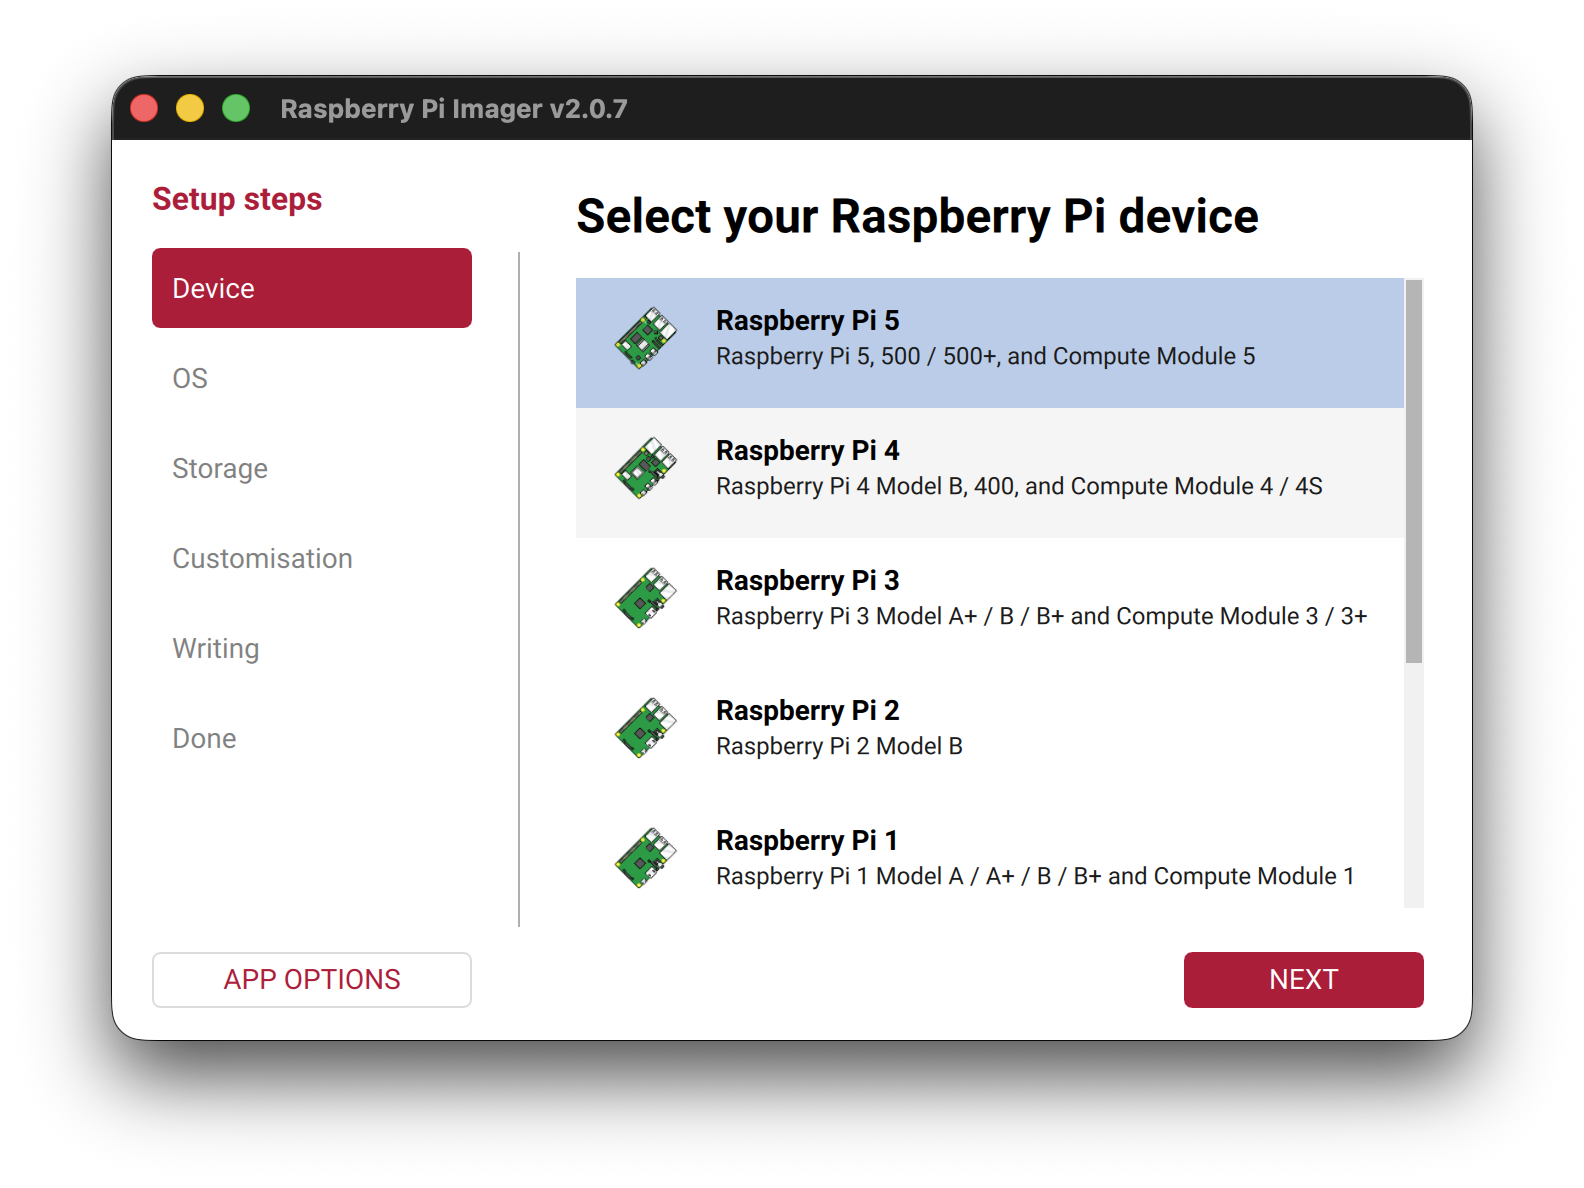
Selecting the OS is a two step process:
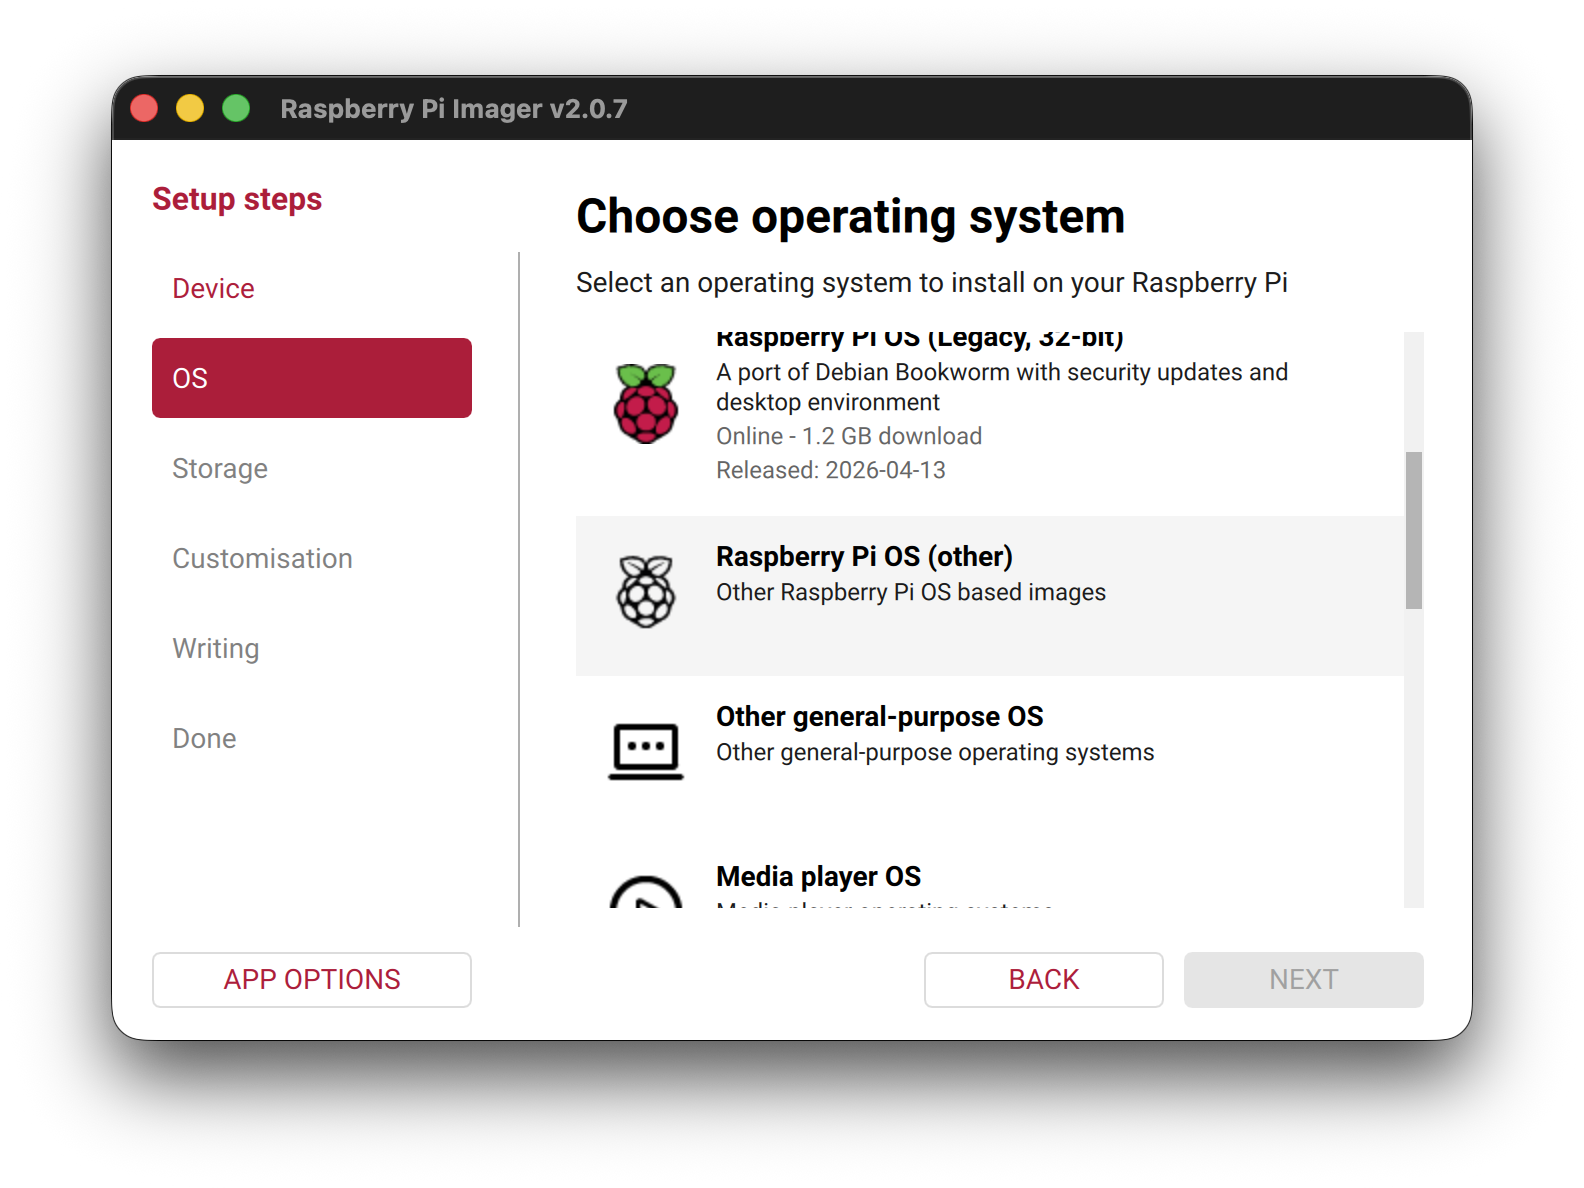
We want the OS with no desktop environment: use
Raspberry Pi OS Lite (64-bit):
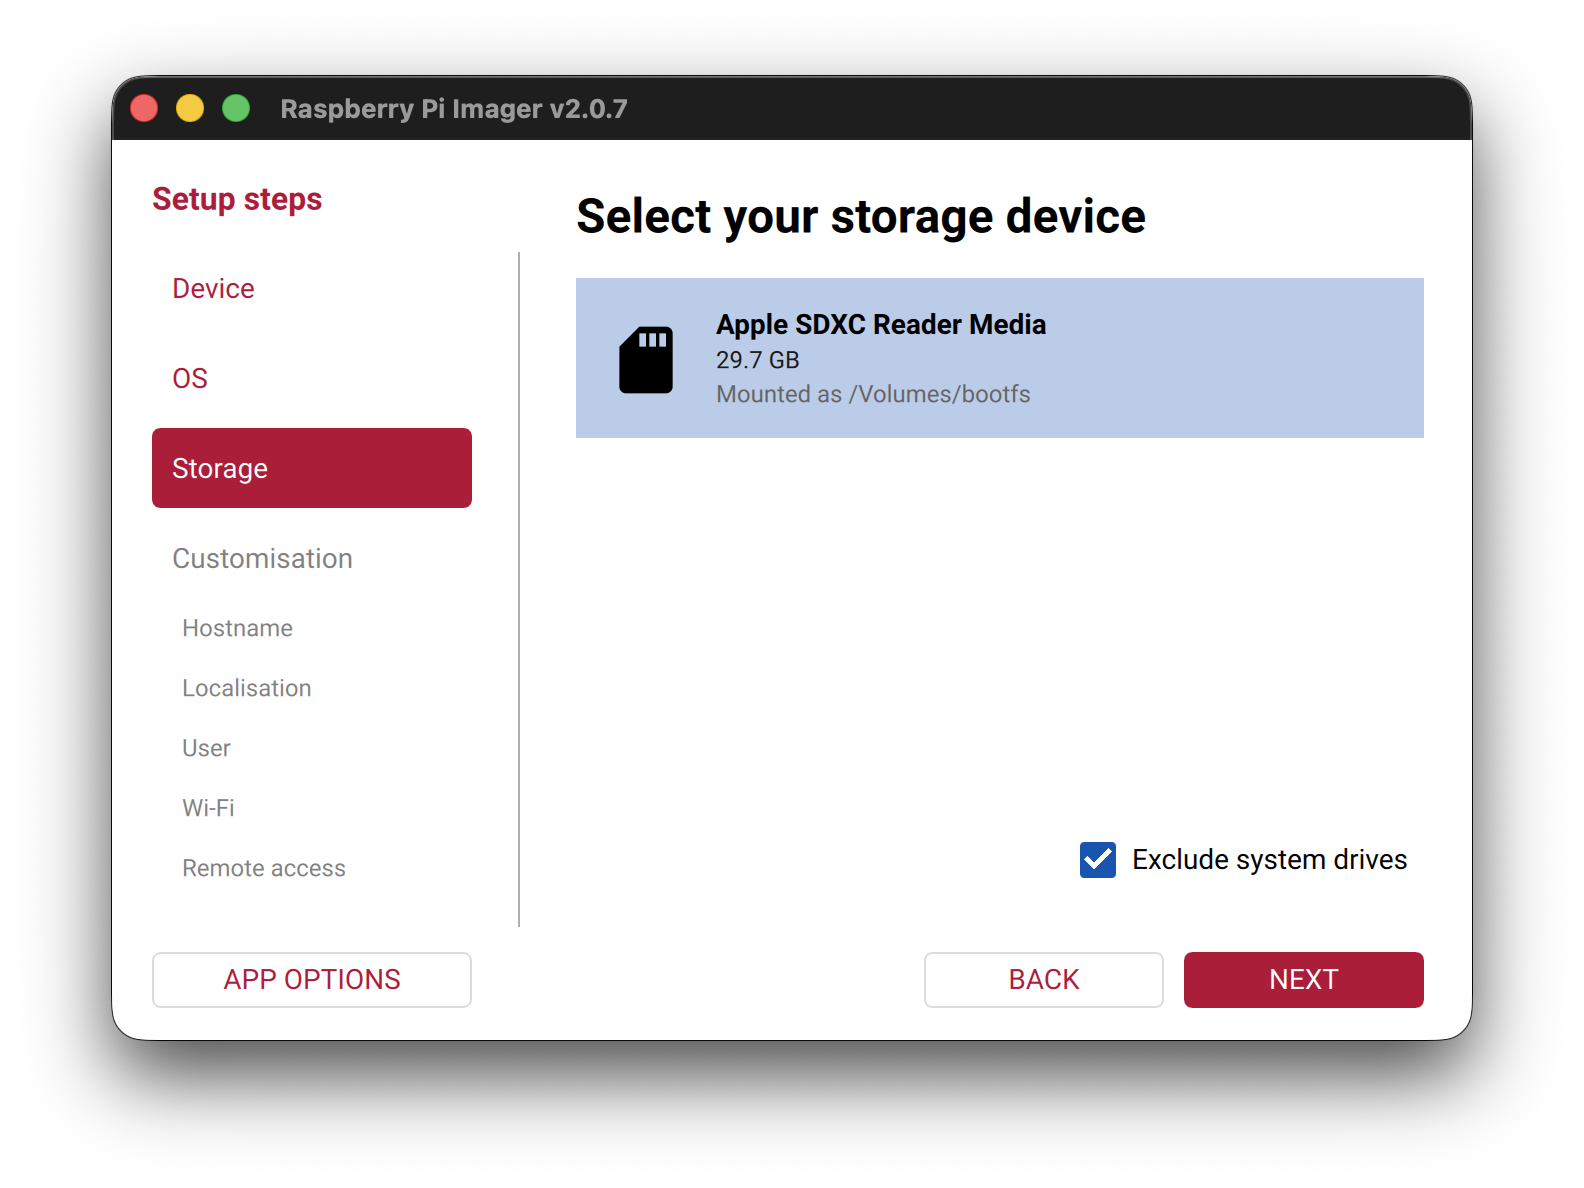
After this, please select the sdcard you would like to flash the
image on, then press NEXT.
The following configuration options can be defined for your set-up such that your OS is pre-configured upon first boot. This is useful as it means we can complete some of the initial configuration before flashing the image, without a screen and keyboard for the Pi.
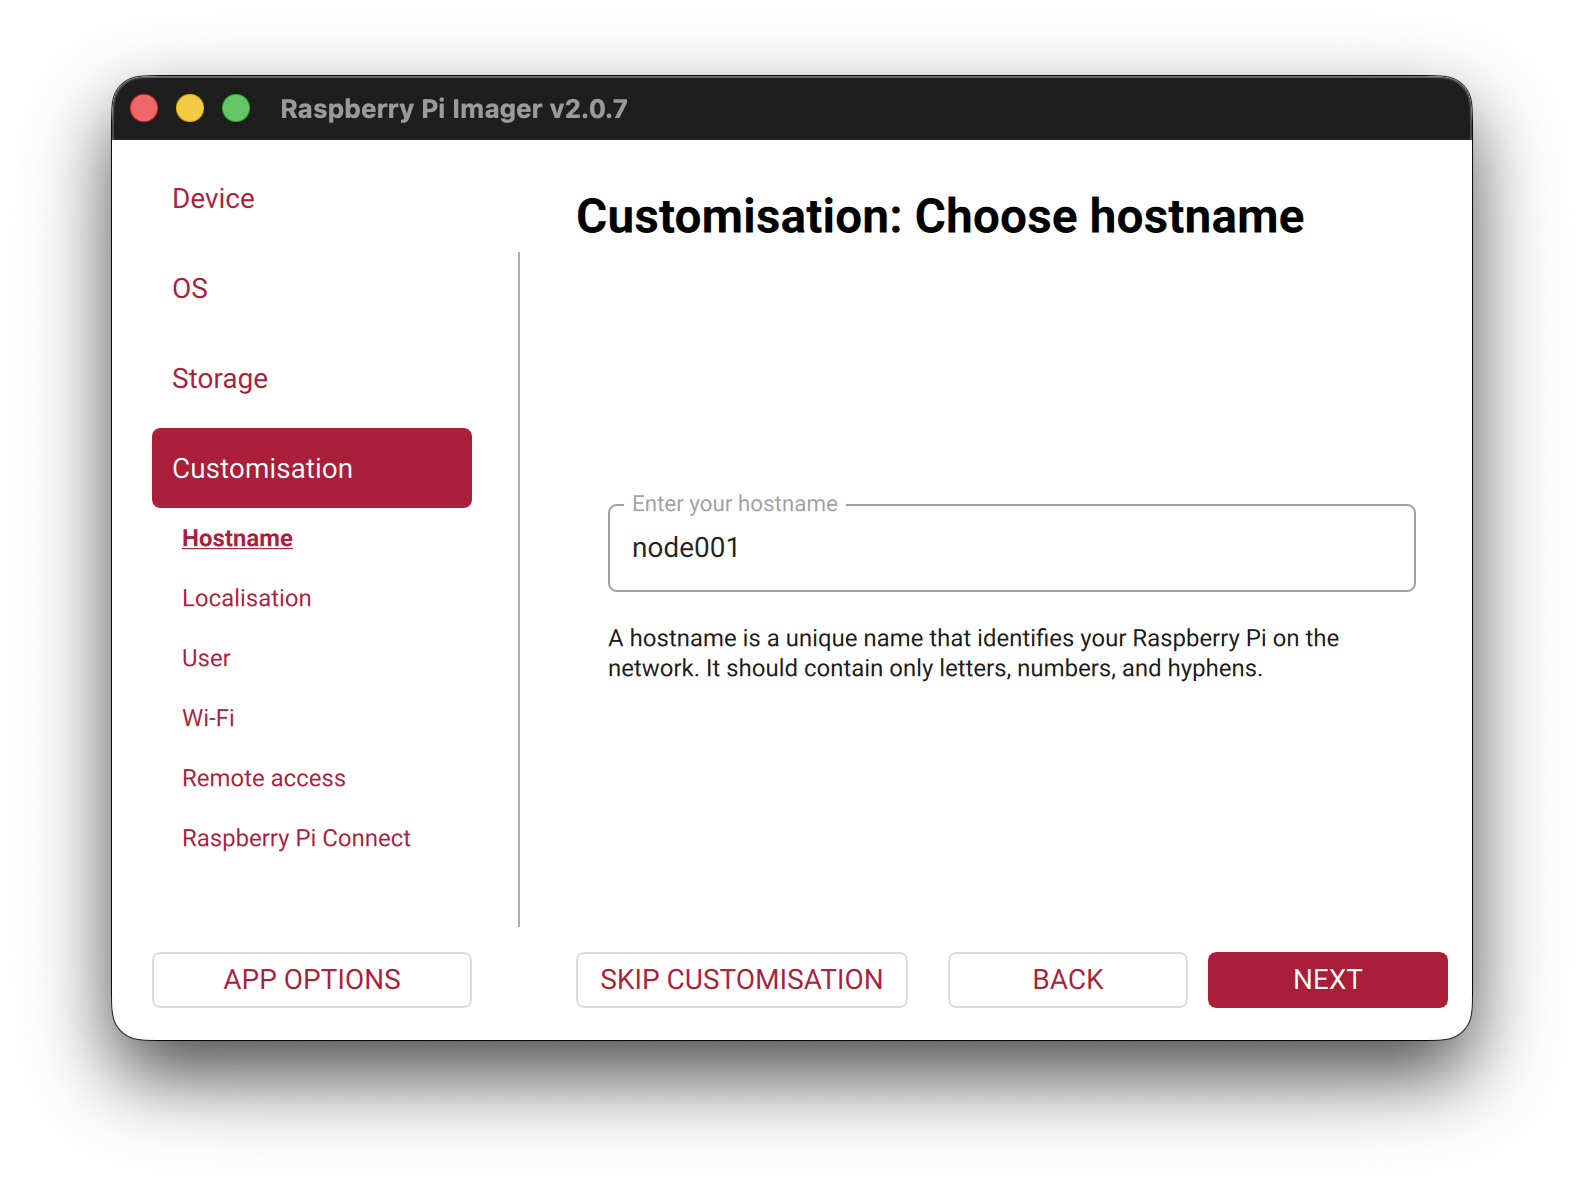
At this point, we can enter the hostname:
Hostname:
node01
Repeating this for the second Pi, we will use a different hostname
e.g. node02.
Check the label on your Pis for the hostname to use.
In the Localisation screen, select options for United Kingdom / London.
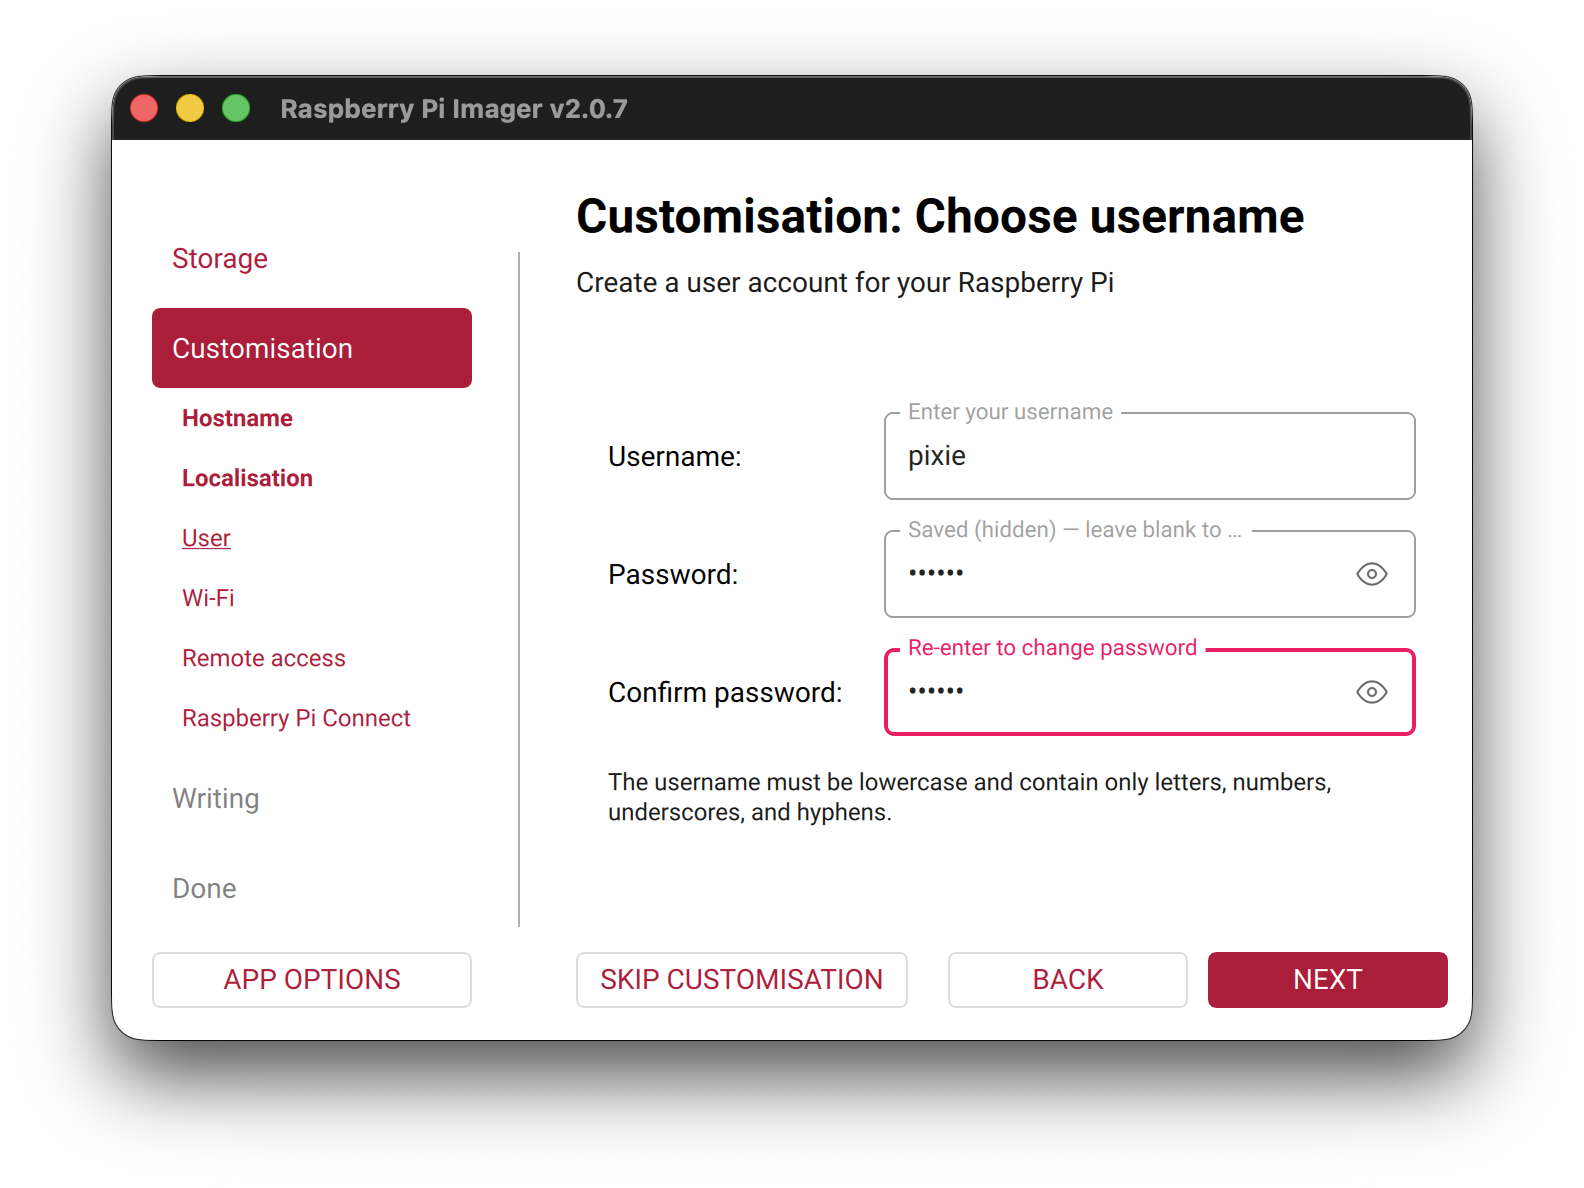
Next, set the username and password that will be used to log into the
Pi using the ssh command.
- Username:
pixie - Password:
0nl1n3
Tip
We’ve noticed occasional issues using the login name pi
on fresh Rasbian Lite image: it takes you round in circles back to a
login prompt! We’ll use a different name to be sure here.
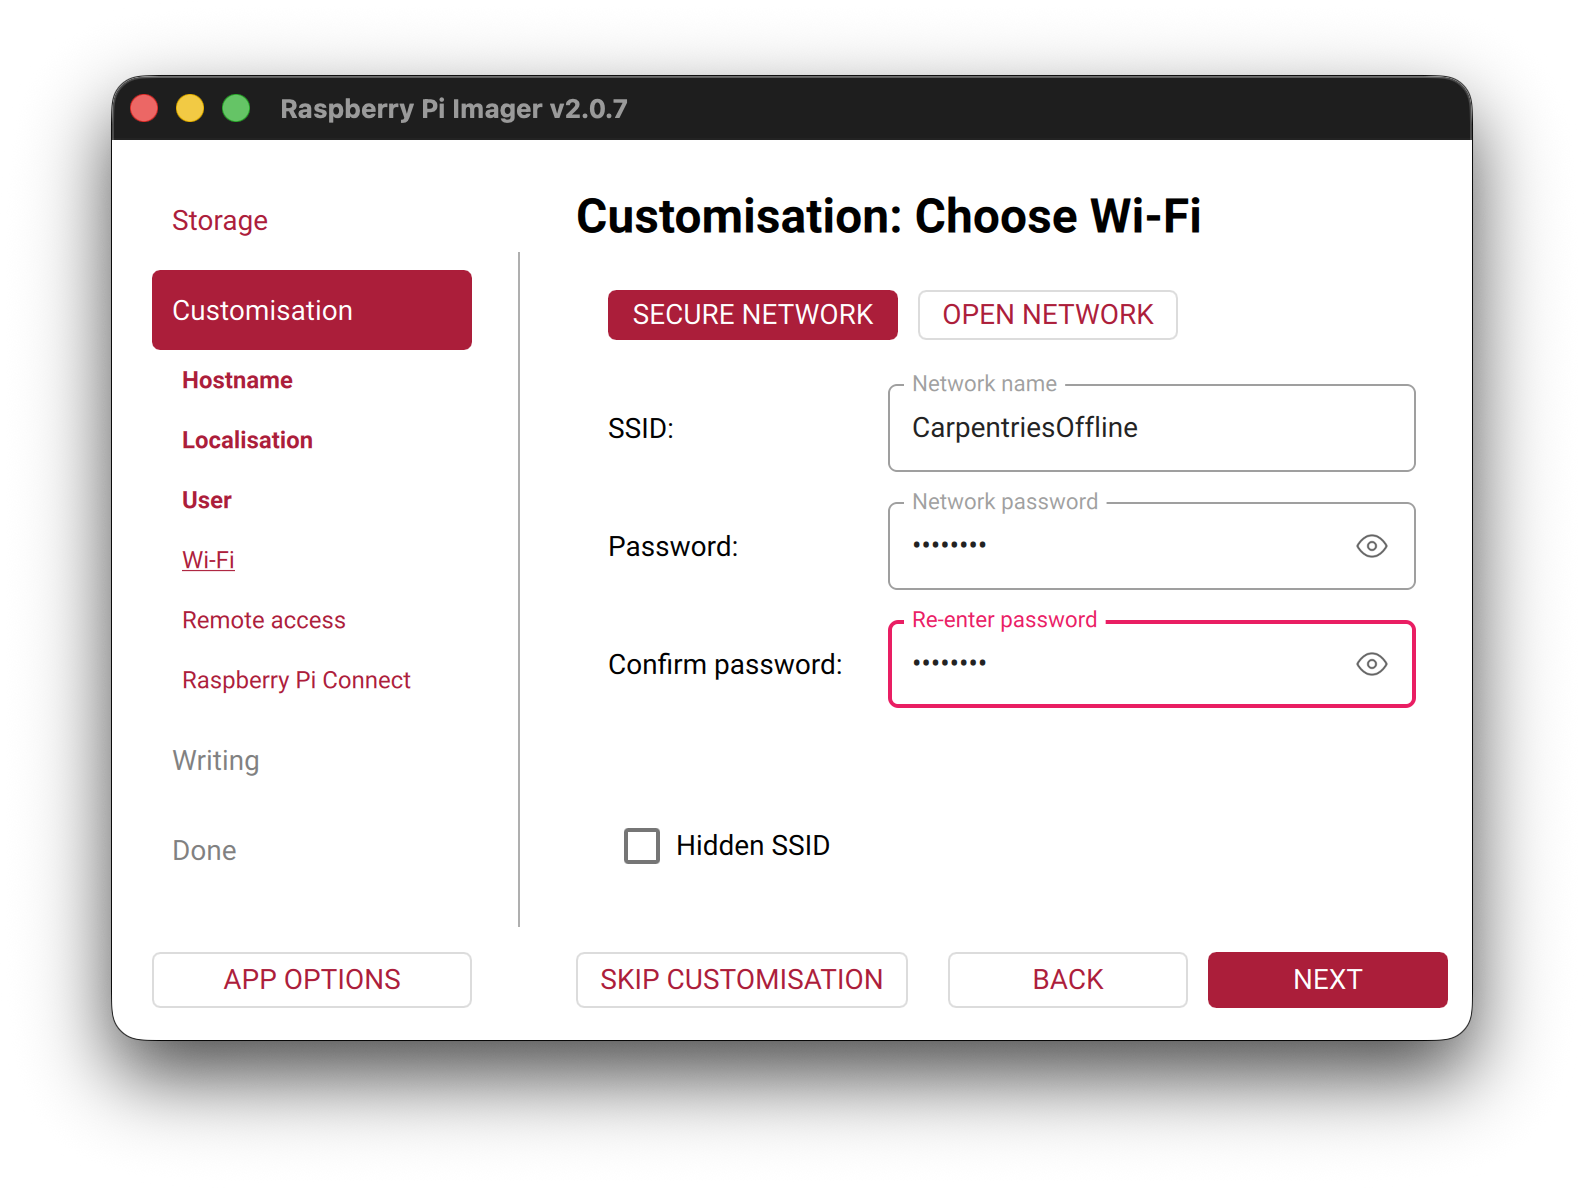
Customisation: Choose Wi-Fi: next, enter your WiFi details.
For our workshop, we are using the network
CarpentriesOffline.
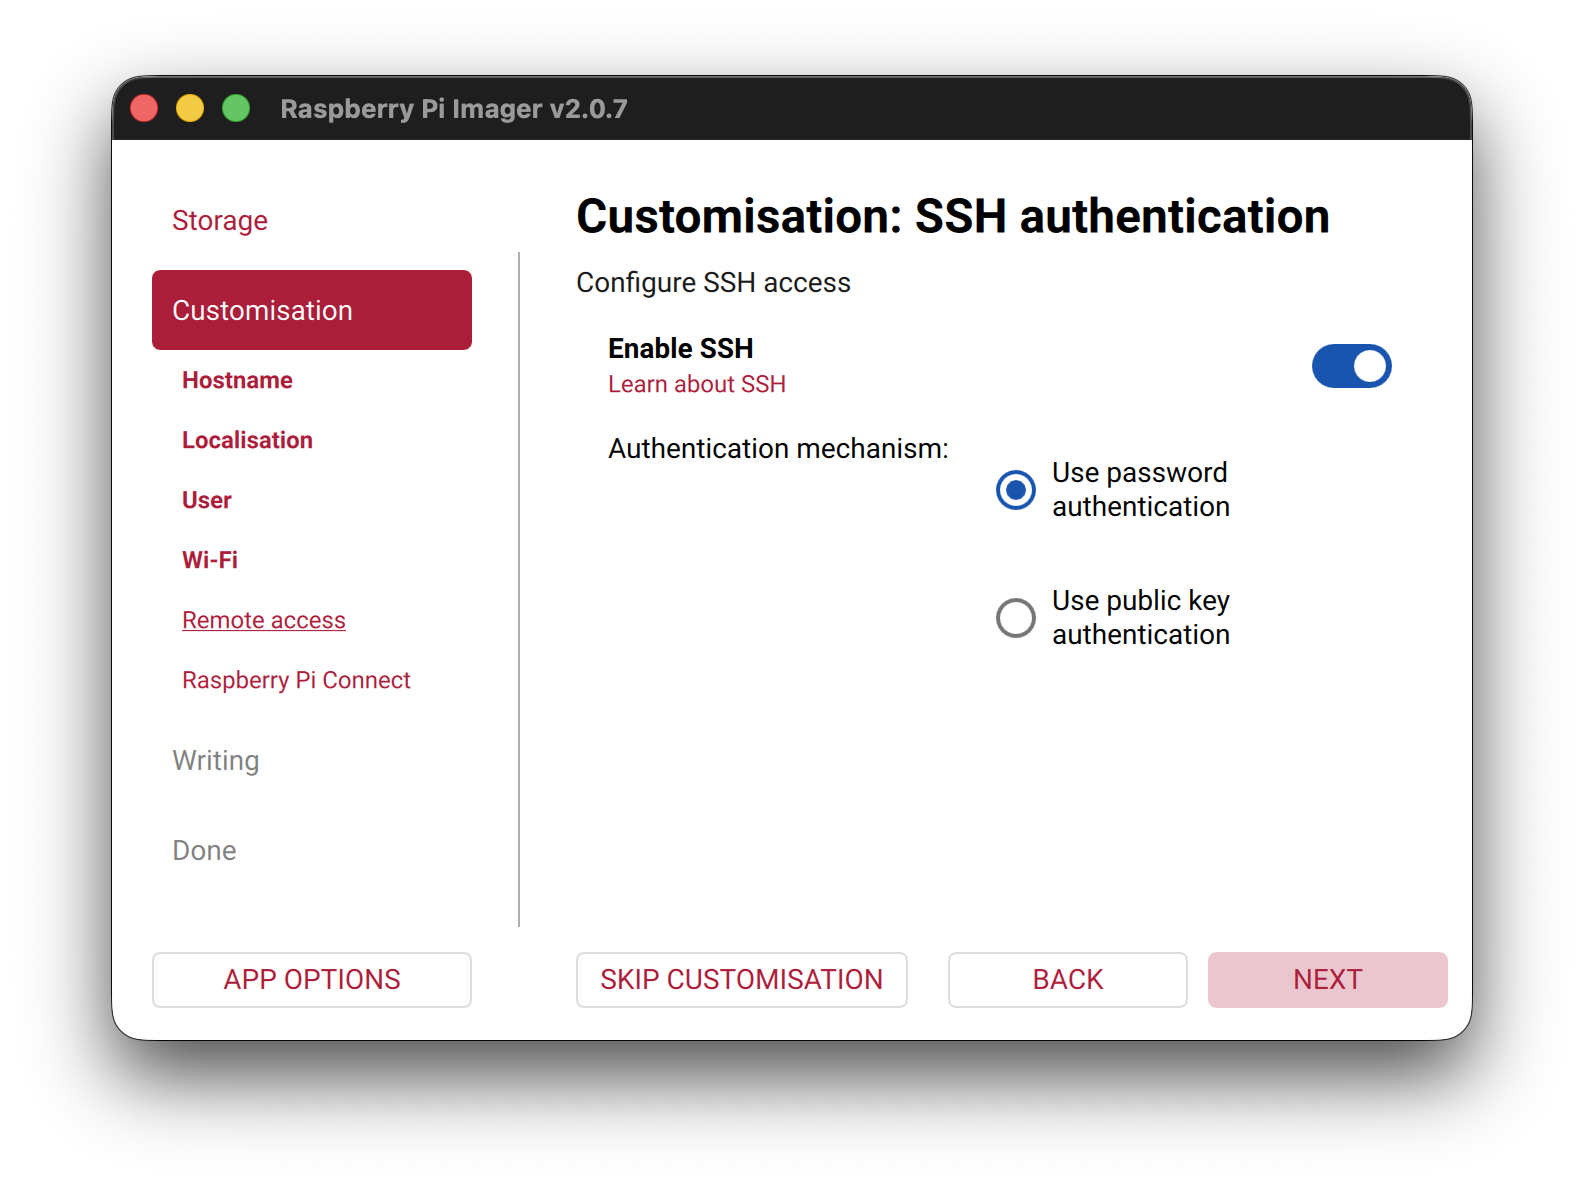
Then on the “Remote Access” page, enable SSH with password authentication (alternatively, by adding a ssh public key).
After, saving this, select NEXT to apply the
configuration. We can skip the final screen on setting up Raspberry Pi
Connect.
Confirm writing to the sdcard (please backup any data on the sdcard, any existing data will be LOST!)
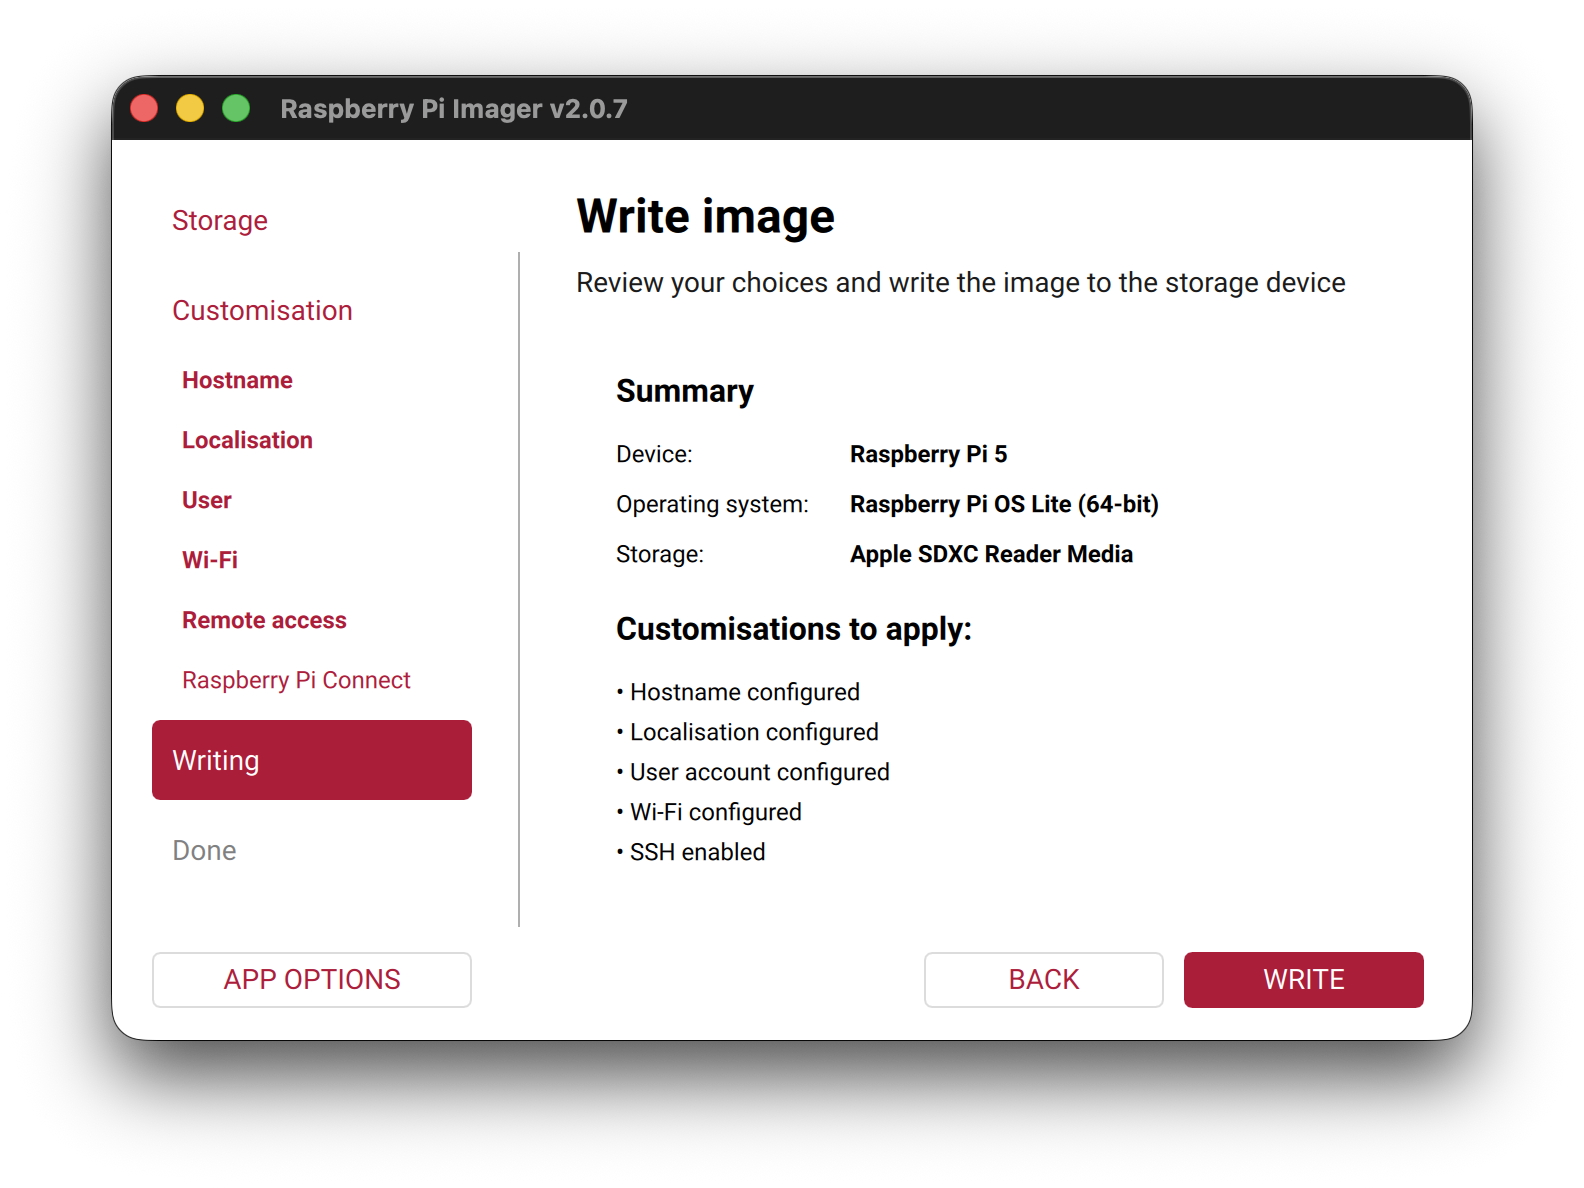
Once the image has been written to the SD card a Write Successful message will be displayed. You can now remove the SD card from your computer and insert it into the Raspberry Pi.
- The Raspberry Pi Imager tool writes OS images to SD cards and supports pre-configuration before first boot
- Configure hostname, username, password, SSH, and WiFi in the Imager to save manual setup time after booting